In my last homelab misadventure, I wrapped up unable to reach my Veeam server. After a little sulking and a lot of thinking, I decided to nuke it from orbit and just start from scratch. Sometimes trying to patch up old decisions isn’t worth it, especially when you made those choices late at night with one eye closed.
Before hitting the big red reset button, I considered all my options. There are plenty of other free backup platforms out there, but Veeam is the one I’m most familiar with, and honestly, it’s a staple in enterprise environments for a reason. The free version lets you back up up to 10 VM’s—which is more than enough for my lab—so sticking with what works made sense.
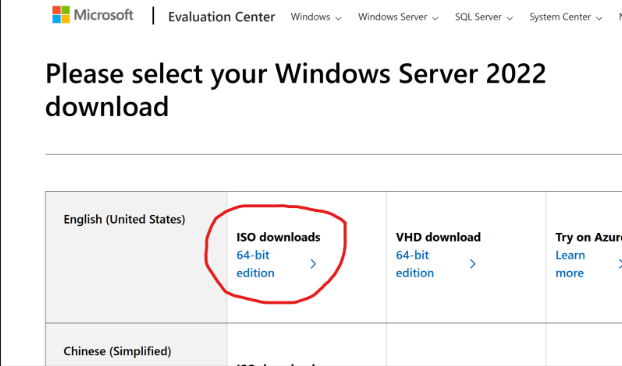
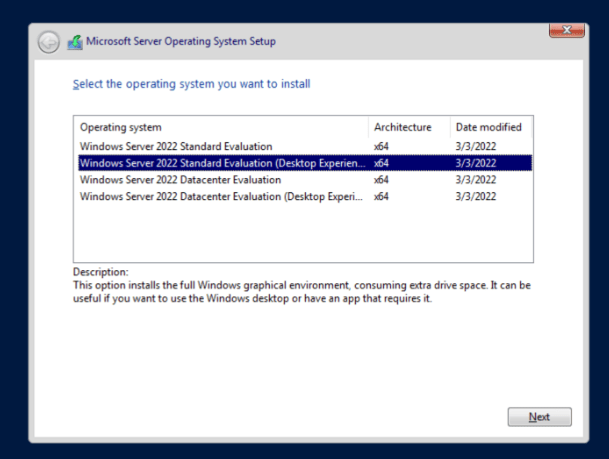
So, I deleted my Veeam VM (JR-VEEAM-01), cleaned up the leftovers, and prepped my trusty Windows Server ISO. Creating a fresh VM in Hyper-V took all of two minutes—this time with a slightly bigger disk, because you can never have too much storage, right?
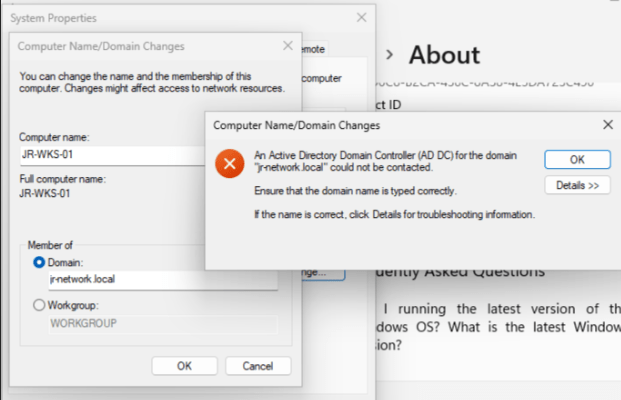
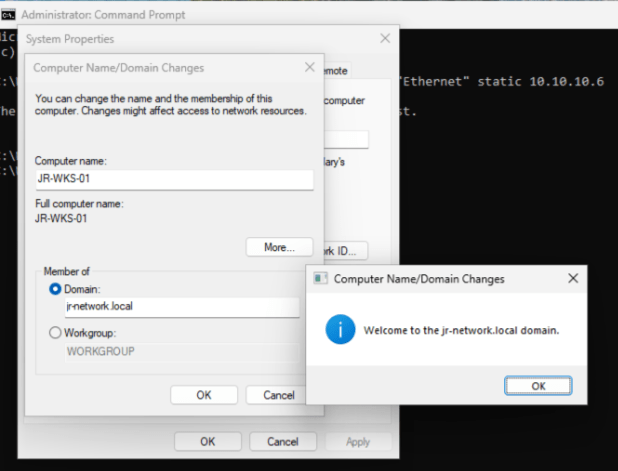
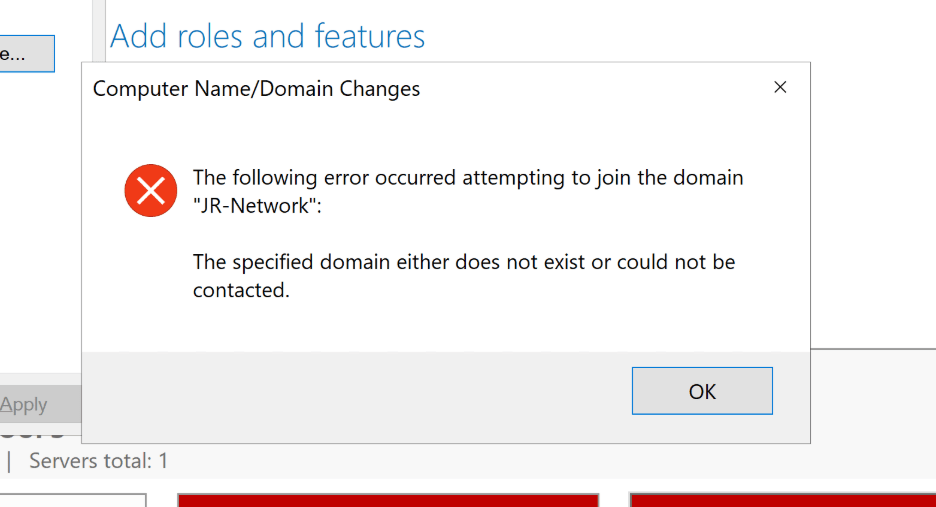
The VM fired up without a single complaint, and the Windows Server install was done and dusted in just a couple of minutes. While it worked its magic, I switched over to my Domain Controller to set up a shiny new Domain Admin account—nothing like a fresh start all around. Once Windows finished installing, I renamed the server to JR-VEEAM-01 and aimed to join it to the domain. Or, well… I tried.
Wouldn’t you know it—same domain join error I ran into when setting up my workstation before. Classic homelab déjà vu.
Turns out, I’d skipped setting up the network adapter properly. The server was on the right subnet, but the DNS was still pointed at the default gateway. A quick PowerShell session sorted that out:
# Assign new IP, subnet, gateway
New-NetIPAddress -InterfaceAlias “Ethernet” -IPAddress 10.10.10.7 -PrefixLength 24 -DefaultGateway 10.10.10.1
# Assign DNS server
Set-DnsClientServerAddress -InterfaceAlias “Ethernet” -ServerAddresses 10.10.10.6
Just to be sure, I ran a couple of commands to check everything updated as expected:
Get-NetIPAddress -InterfaceAlias “Ethernet”
Get-DnsClientServerAddress -InterfaceAlias “Ethernet”
After patting myself on the back for fixing the adapter, I promptly hit another “oops” moment: I’d only been using the UPN to join the domain, not the proper Domain\UPN format. Turns out, reading prompts helps. Once I logged in correctly, the domain join went through without a hitch. Noice.

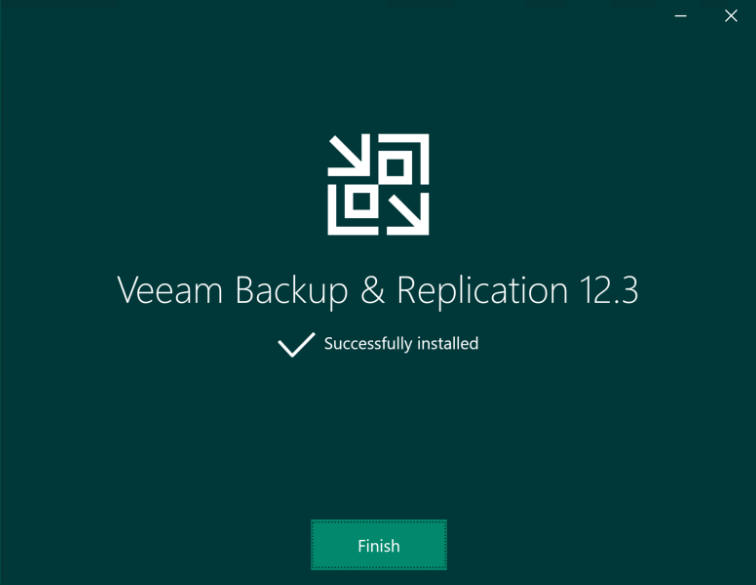
Once the VM had restarted and settled into its new domain home, it was time for the main event—getting Veeam installed. I headed over to Veeam Software for Enterprise, signed in (pro tip: you’ll need a free account to grab Veeam Backup & Replication), and got the download rolling.
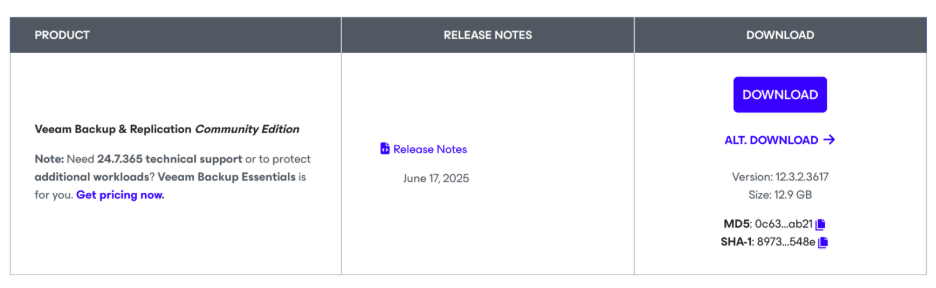
With the install file in hand, I mounted the ISO, fired up the setup, and got greeted by the install wizard. Right off the bat, it asked for a license—since I’m using the free community edition, a simple tap of “Next” did the trick. No license key, no stress.
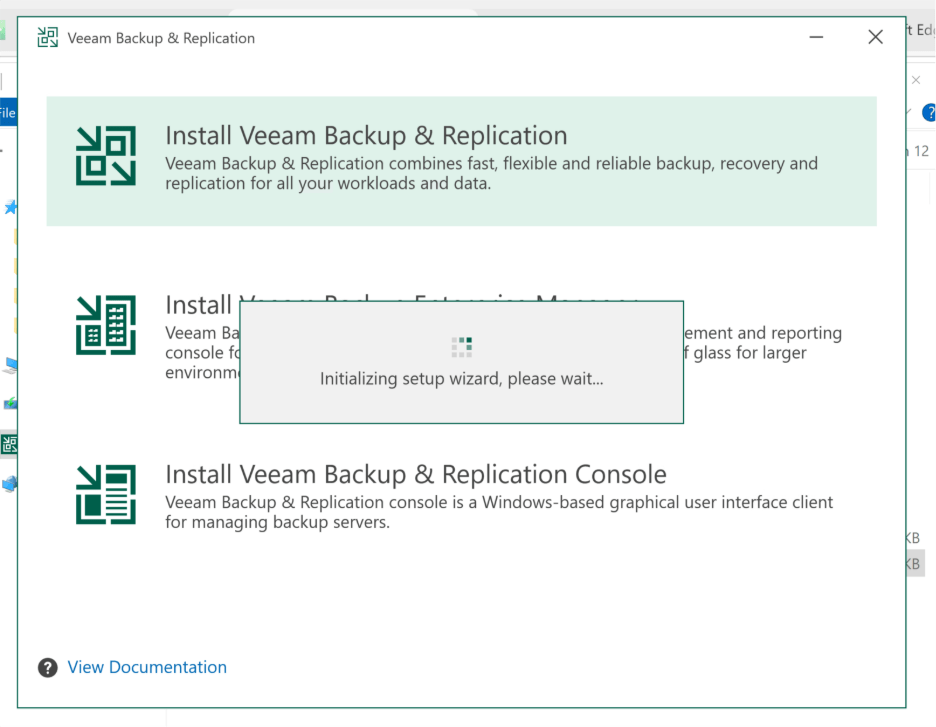
Veeam checked my system for missing features and dependencies, offering to install anything needed (which, lucky for me, wasn’t much this time). After that, I kicked back with a cup of tea and about half a pack of biscuits. By the time my mug was empty, Veeam was installed and ready to go.

Now for the fun part: cracking open the Veeam console and finally getting into the backup setup.
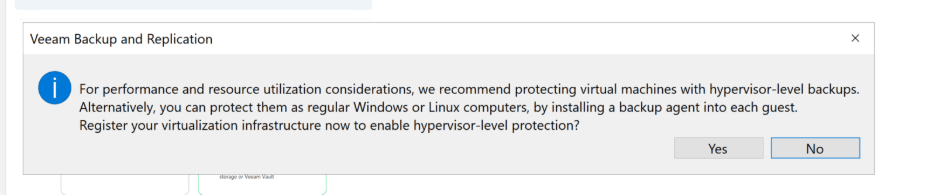
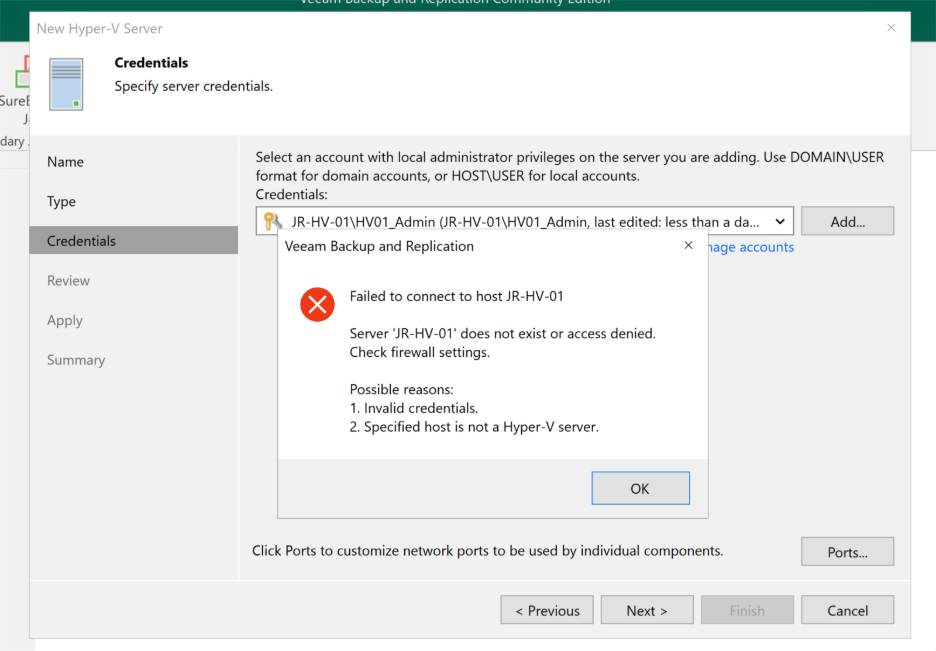
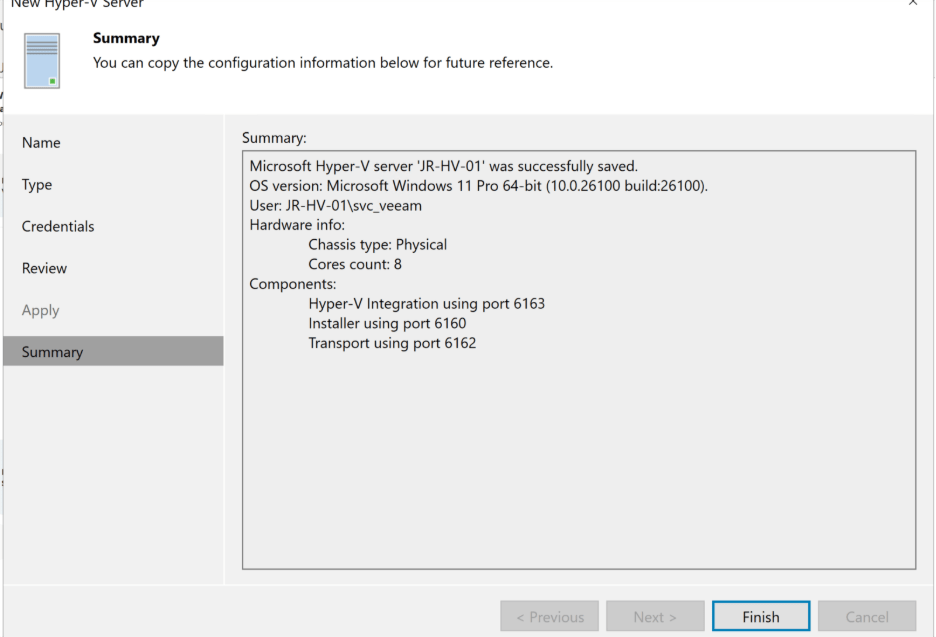
Before I could dive straight into setting up those backup jobs, Veeam put up a window asking if I wanted to register the host—best practice in most cases, so of course, I hit “YES.” This kicked off another wizard to add my Hyper-V host. I punched in the device name, set the type as “Hyper-V Standalone Server,” and plugged in the credentials for the host’s local admin account.
Naturally, that’s when I hit an error. (Is it even a homelab setup if you don’t hit a permissions snag or two?) Instead of wrestling with password resets or risking bad security habits, I pivoted to best practices: jumped back on the host and quickly created a dedicated service account called svc_veeam just for Veeam’s use.
Back in the Veeam console, I swapped in the new service account credentials. After a quick round of testing and validation, Veeam gave me the green light—the host was now registered and ready for Hyper-V backups!
With the host officially registered, I figured it was finally time to set up some backup jobs. I jumped up to the top left, clicked “Backup Job,” and selected “Virtual Machine Backup.” I even gave my job a fancy new name—Hyper_V_Daily—and got ready to pick which VMs to backup… except, weirdly, there were no VMs listed.
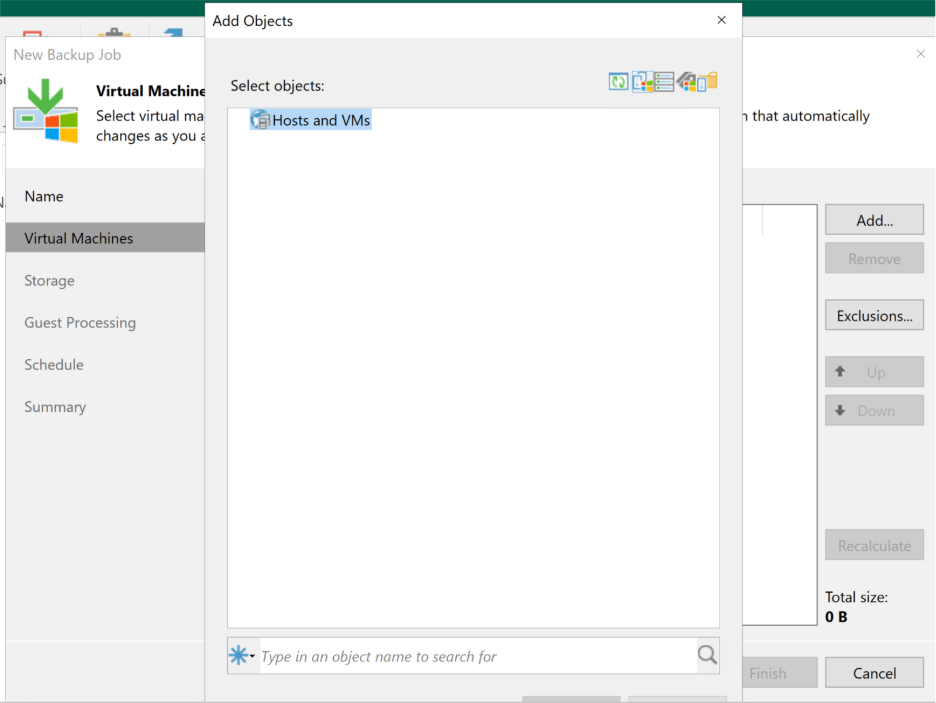
Not to be outdone by a blank window, I hopped over to Backup Infrastructure, rescanned the host, and tried again. Still nothing. That’s when it hit me: facepalm moment. I’d only added the host itself, not the actual guest VMs. To get those into the mix, I’d need to add them manually—with proper domain admin rights, of course.
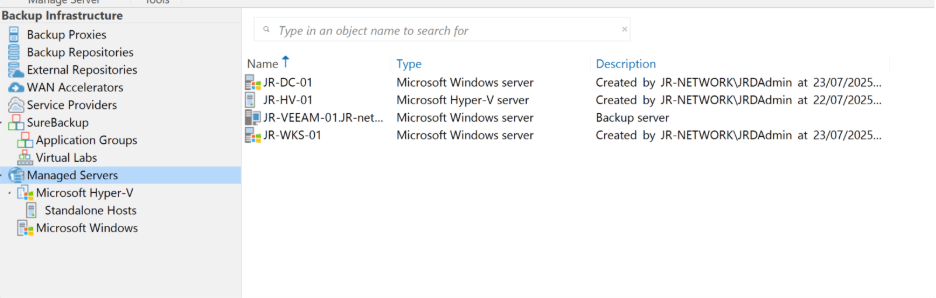
So off I went to the domain controller to spin up a domain service account just for Veeam. Then, back in the Veeam console, I made my way to Backup Infrastructure, selected “Managed Servers,” and added my other two VM’s—JR-DC-01 and JR-WKS-01—using the same best-practice process. No need to add JR-VEEAM-01 since Veeam was running right there already. In theory, this should have been the breakthrough.
But theory doesn’t always translate to practice! When I tried to connect to my test workstation, up popped another error.

Well, that sounded like your run-of-the-mill communication issue. Time for some basic troubleshooting: I fired up Command Prompt and tried to ping the workstation—and wouldn’t you know it, zero response. Looks like we found our next issue.
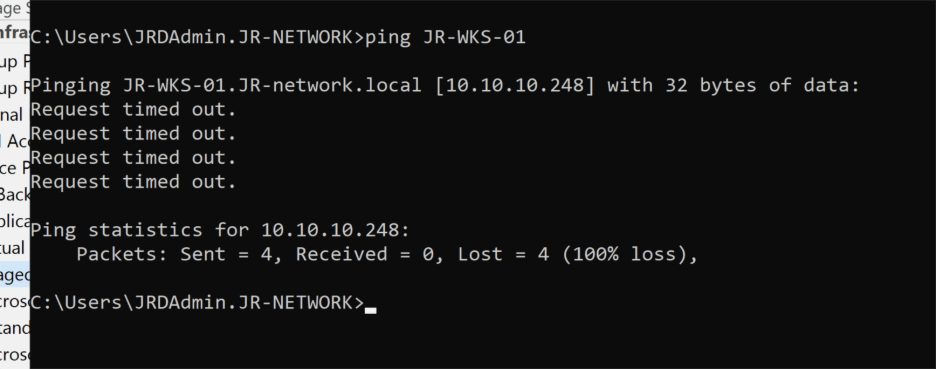
So, I hopped over to the workstation and opened up good old Command Prompt to see what was happening. The network settings looked fine: the IP was in the right subnet, and interestingly, the workstation could actually ping the Veeam server without any issues. Okay… so why couldn’t the Veeam server see the workstation?

That got me thinking—maybe something was actively blocking the traffic from the Veeam side. A peek at Windows Defender Firewall on JR-WKS-01 revealed that all network profiles—Domain, Private, and Guest/Public—were enabled. For now, I decided to just switch them all off (don’t worry, Group Policy will be handling these rules properly later on).
Back at the Veeam server, I tried pinging the workstation again—and bingo, it worked! Sometimes troubleshooting is as simple as flipping the right switch. Simples!

With both devices finally talking to each other, I tried adding the workstation once more—and this time, Veeam installed the necessary components without a hiccup. Success! Now all three VM’s were showing up in Veeam, which meant, in theory, I was ready to finally create that daily backup job.
Well… not so fast. I went through the steps to set up a new backup job and, yet again, none of my VM’s appeared. At this point, Windows Defender Firewall seemed like the usual suspect—not just on the workstation, but maybe on the host as well.
Sure enough, on the Hyper-V host, the firewall was not only enabled, but the network profile was set to “guest” instead of “private.” That’s an easy fix: I opened PowerShell and ran:
Set-NetConnectionProfile -Name “JR_Home 2” -NetworkCategory Private
Then I disabled Windows Defender for good measure. After another trip back to Veeam and a rescan of the host, I optimistically tried to set up the job once again… and nothing. Still couldn’t see any of the guest VM’s. Weird.
Time for some deeper troubleshooting. I double-checked that WMI was working—no issues there. Next, I wondered if the fact that the host wasn’t joined to the domain could be blocking remote management. So, I fired up this command to test connectivity:
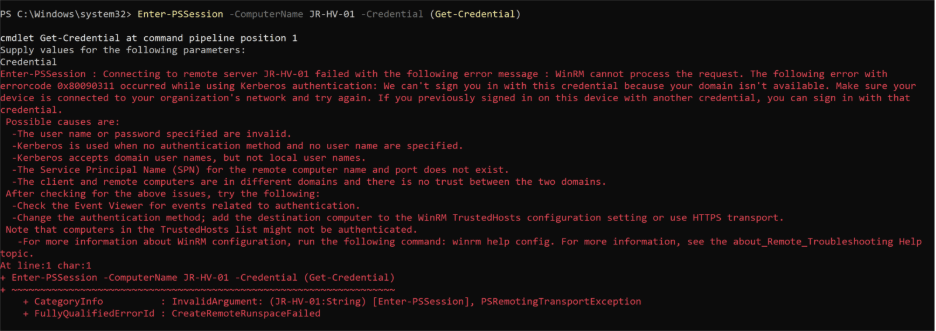
Enter-PSSession -ComputerName JR-HV-01 -Credential (Get-Credential)
And prepared for the next plot twist…
Sure enough, the Enter-PSSession command threw an error. At least I was getting somewhere—an error is better than nothing! My first instinct was to simply add the host to the domain, but since this is just a test environment, I’d rather not overcomplicate things. There had to be a workaround, so I dug a little deeper.
Good news—there is! You can configure WinRM to work across workgroup or non-domain devices. It takes a little more setup, mostly around adding the Hyper-V host to the list of trusted devices, tweaking authentication settings to use NTLM instead of Kerberos, and enabling remote access.
First up, on the host itself, I opened PowerShell and ran:
Enable-PSRemoting –Force
Super straightforward. Next, I hopped back to the Veeam server and added the host as a trusted device:
Set-Item WSMan:\localhost\Client\TrustedHosts -Value “JR-HV-01” -Force
Time to test if things were finally communicating. Here’s the kicker—you have to use the default local Administrator account, not just any local admin. That realization cost me a few unnecessary retries. The winning command:
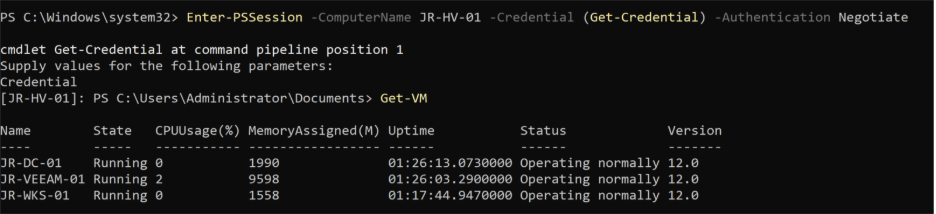
Enter-PSSession -ComputerName JR-HV-01 -Credential (Get-Credential) -Authentication Negotiate
I logged in as the local admin, ran Get-VM, and at last—Veeam could see the guests! High hopes, back to the Veeam console, rescanned the host, and crossed my fingers.
And… still nothing. Turns out, even switching to the Administrator account credentials in Backup Infrastructure didn’t solve it. Every time I thought I’d cracked it, Veeam threw up another “nope.”
This produced an error, and while that’s not ideal, at least it gave me something to work with. My first thought was to just add the host to the domain and be done with it, but since this is a test environment, I wanted a cleaner fix. Thankfully, there’s a workaround—WinRM can actually be set up to allow communication across workgroup or non-domain devices.
To get this going, I opened PowerShell on the host and ran:
Enable-PSRemoting –Force
That was an easy win. Next, on the Veeam server, I needed to list the Hyper-V host as a trusted device:
Set-Item WSMan:\localhost\Client\TrustedHosts -Value “JR-HV-01” -Force
For the real test, I tried to remote in from the Veeam server. Heads-up: this only works if you use the default local Administrator account—not just any account with local admin rights (it took me more tries than I’ll admit to figure that out!):
Enter-PSSession -ComputerName JR-HV-01 -Credential (Get-Credential) -Authentication Negotiate
With the right credentials, I was able to run Get-VM and finally confirm that the server could see the guests. Back in Veeam, hope surged as I rescanned the host and switched credentials to the Administrator account… but, once again, nada. Even with all the right moves, Veeam still wouldn’t play ball. This homelab adventure wasn’t done with me yet!
At this point, we’d tested just about everything—and I started wondering if maybe some old configuration was still causing trouble. So, I did the classic “turn it off and on again,” giving the box a restart. Honestly, I wasn’t expecting much, and sure enough, it didn’t help. Now I was just staring at the Veeam console, fresh out of ideas and starting to dig into research. I even ended up troubleshooting live with ChatGPT.
Out of nowhere, something clicked. I thought back to managing replicas in enterprise environments—there’s always a dedicated section for Microsoft Hyper-V under Backup Infrastructure, where you see your host and its guest VMs grouped neatly. Here, none of that. That’s when I figured it was time to revisit the Veeam documentation.
And there it was: a crucial detail I’d missed. Before blowing everything away, I thought a reinstall might fix things, so I downloaded the latest ISO and, while it was chugging along, double-checked my Hyper-V tools on the Veeam server with:
Get-WindowsFeature *hyper*
Turns out, I was missing the Hyper-V management components. Fixing that was simple:
Install-WindowsFeature -Name RSAT-Hyper-V-Tools –IncludeAllSubFeature
Once Hyper-V tools finished up (and the ISO download was done), I reinstalled Veeam from scratch. But this time, I paid attention to every little detail in the wizard—and that’s where I saw the magic line:
“Hyper-V on Windows Client OS is supported only as an Instant Recovery target and for the Data Labs functionality. Host-based backup of VMs running on such Hyper-V host is not supported, but you can use agent-based backup instead.”
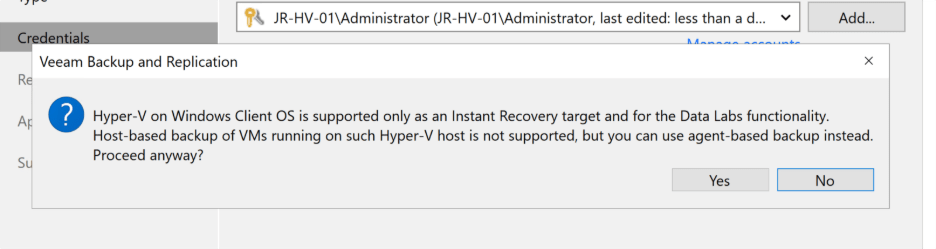
And there was my answer. If your Hyper-V host is running Windows 10/11 Home, Pro, or Enterprise, host-based VM backups simply won’t work. My lab runs on Windows 11 Pro—it’s my daily driver as well as my server. I was both relieved and frustrated to finally get the explanation!
So, where did that leave me? I had two choices: either upgrade my host to Windows Server OS (which felt like overkill for a machine that doubles as my daily driver), or go the Agent Based backup route. Easy decision—the agent method wins.
This is where things start to look a little different. Instead of charging ahead with “New Backup,” I went over to Inventory and chose to Create New Protection Group. Since all my VMs play nicely together in the same domain, I went for the Microsoft Active Directory objects option.
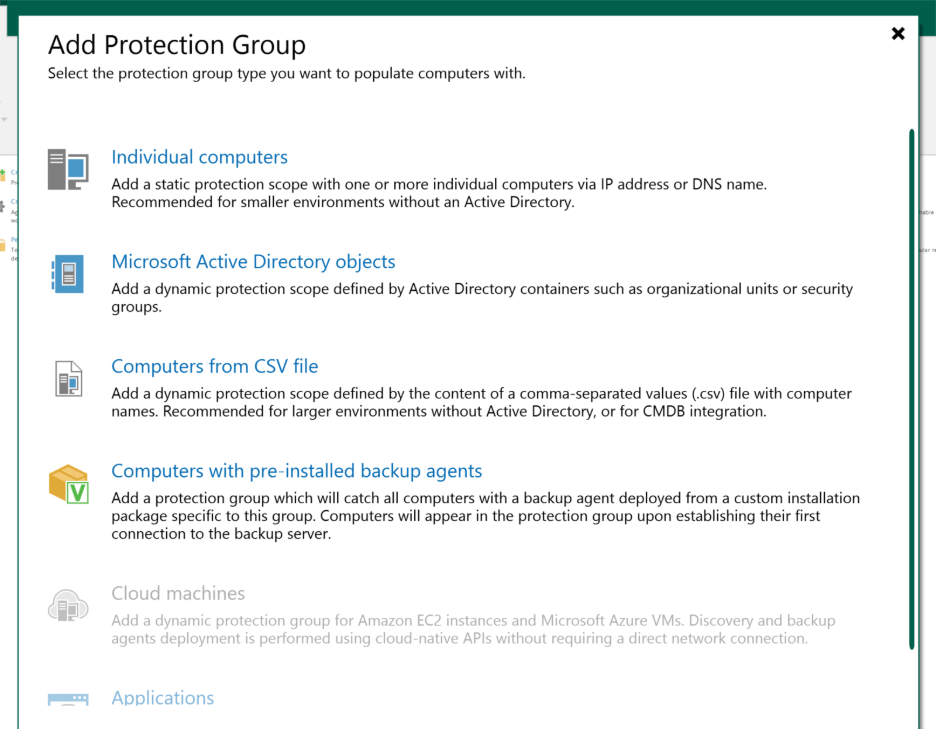
The wizard guided me through naming the group and picking my domain, which let me see all my lab machines in one place. I selected every VM I wanted to protect and cleared out the default exclusions—don’t need anything hiding from me at backup time.

Next, I set it to use the domain Veeam Service account I’d already created, and tweaked the device discovery and agent deployment options. Because my homelab isn’t always online, I decided to have the discovery job run every hour. Maybe a little aggressive, but I’d rather be safe than sorry with my quirky lab uptime.

After a quick review, I hit Apply. The group was created, Veeam scanned the devices, and suddenly things were starting to look a lot more promising.
Now that the protection group was up and running, it was time for one of the most important pieces: actually picking where my precious backups should live. By default, Veeam wants to save files on the backup server itself—but I had other plans. I wanted my backups sitting pretty on a dedicated SSD in my host, not just anywhere.
Setting this up was straightforward. In the Veeam Console, I headed to Backup Infrastructure, selected “Backup Repositories,” and chose “Add Repository.” Since my VM is directly attached to the storage, I selected “Direct Attached Storage” and then “Windows.” From there, it was just a matter of giving my repository a name and making sure the server was set to JR-HV-01, not JR-VEEAM-01.
A couple more clicks and I pointed the storage location at my SSD for fast, reliable backup performance. The rest—such as the Mount Server settings—could stay at their defaults. The configuration only took a few minutes, and just like that, my shiny new repository was ready to roll.

Veeam prompted me to use this as the default backup location, and since this SSD is where I want all my backups living, I hit yes. On to the main event—setting up the backup job itself!
At last, it was time for the main event—setting up the actual backup job. From the protection group I’d just built, I right-clicked, chose “Add to backup job,” selected “Windows,” and then “New Job.” This brought up the now incredibly familiar Veeam wizard.

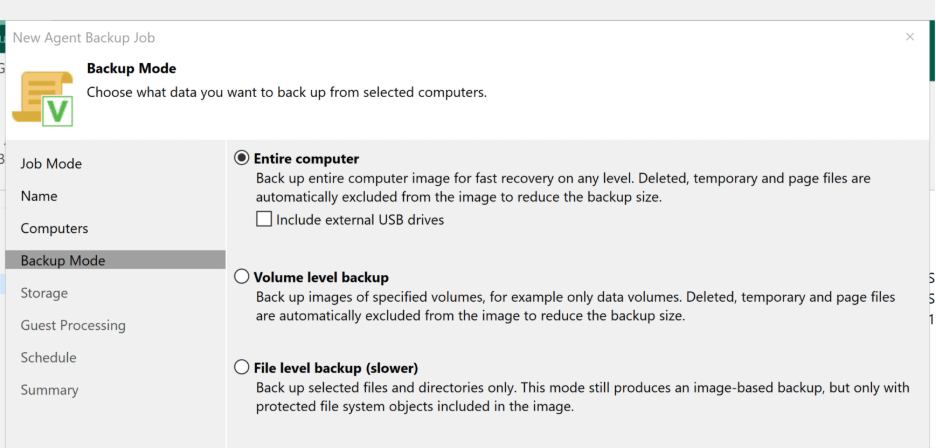
Most of the job options could stay at their safe defaults—I wanted the Veeam Server to handle everything, so I left that set, gave the job a memorable name, and moved on. Since all the computers I wanted to back up were already picked thanks to the protection group, setting those up was a breeze. For max coverage (and peace of mind), I chose to back up the entire machine, not just selected files or volumes.
Next, it was time to point the job at the correct storage. I selected the new backup repository on the SSD, left the Guest Processing options untouched, and moved forward to scheduling. Normally, I’d opt for daily backups, but given my lab isn’t always powered on, I set the job to run every two hours instead. A little extra redundancy never hurt, right?
With everything ready, I hit apply and finish. But of course, you don’t trust a backup until you see it in action—so I headed back to the Veeam console, found my new job, right-clicked it, and selected “Run Active Full.” Then came the moment of truth: cross my fingers, wait it out… and yes! The backup job completed smoothly, no errors in sight.

Success tastes almost as good as that pack of biscuits!
And just like that, another homelab saga comes to an end! I’ll admit, this post ended up much longer than I’d planned—but honestly, that’s the beauty of tinkering in a lab environment. You get to stumble, experiment, and actually learn from the process (even if it involves a few extra cups of tea and a mild existential crisis over why things won’t work).
So, what did we learn this time around?
- Don’t underestimate the value of reading the documentation—especially when it comes to OS limitations!
- Network and firewall settings will trip you up more than you expect—always triple check them.
- Sometimes, starting over really is the best way to fix a sketchy setup.
- And if you’re running Hyper-V on a Windows 10/11 Pro machine, agent-based backups are the way to go.
Now, I’ve finally got Veeam backups configured, which gives me the perfect safety net as I launch into new and crazy experiments in the lab. Redundancy: achieved.
Thanks for following along with this adventure—and I hope you found the journey (and even the pitfalls) helpful! If you prefer a more streamlined “just the method, no misadventures” style for these posts, or if you actually liked seeing all the real-life troubleshooting and mistakes, let me know in the comments!